
Hostwinds Tutorials
Search results for:
Setting up shared FTP folders without a control panel can be a bit confusing and time-consuming. However, with the help of Virtualmin, you can have a shared FTP folder set up in little to no time at all with just a few clicks.
The focus of this article is to show you how to enable shared FTP folders for one or more users in Virtualmin. This article implies that you have already installed Virtualmin. If you have not done so yet, please look at the following article: How to install Virtualmin (CentOS 7).
Before we get started, you'll need to login into your Virtualmin or Webmin account. If you're not certain how to do this, please review the following article, which should assist you with logging in: How to login to Webmin.
You'll also need to have at least one FTP user setup covered in this guide: How to create an FTP account in Virtualmin. After creating at least one FTP user, please proceed with the following steps to set up shared FTP folders.
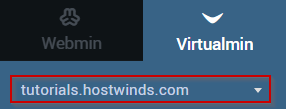
- Select the domain that you'd like to add the shared folder to from the dropdown menu
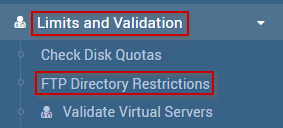
- Locate and click on the Limits and Validation menu
- Select FTP Directory Restrictions
- To create a new access rule select the Active? checkbox for a blank or unused rule
- Fill in the requested information to your needs.
- Once you're satisfied with the information you have input, click Save
As always, if you have any other questions or need further assistance, please feel free to contact our 24/7 Live Chat, and we'll be happy to help you.

Once this is complete, any specified user should have read access to ALL directories within this specific virtual server and write (upload) access to their respective home directory.
Written by Michael Brower / June 22, 2017