
Hosting Tutorials
Search results for:
Table of Contents
How to Find Files on Ubuntu with Terminal
Tags: Cloud Servers, Dedicated Server
In this tutorial, we'll go over a number of methods for finding files and directories (i.e., folders) in Ubuntu 20.04 LTS, such as finding all files with a .old extension or finding all files and directories larger than 2 GB. We'll also go over how to run one or more commands on each file found.
Note that one of the command we'll use is locate, which does not natively come with Ubuntu. The locate command is often faster than find because it maintains a database of all files which is updated every 24 hours. The locate command can be installed as follows:
sudo apt install mlocateBecause everything in Unix-like operating systems, including Ubuntu, is considered a file, the term "file" will also indicate "directory" unless otherwise called out. Additionally, the desktop environment examples are based on GNOME. To learn how to access your remote Ubuntu computer using GNOME, see Using Windows Remote Desktop with Ubuntu 20.04 TLS.
With that, let's get started.
Listing files
To list all files from the current directory down, the following commands may be used:
find
The unadorned find command recursively list all files from the current directory:
find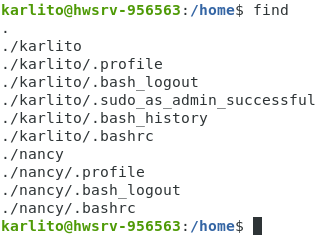
locate
The locate command is similar to find but requires a pattern (the wildcard character in this case):
locate *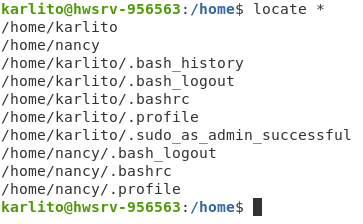
The speed of locate comes at a price, however. Recently modified files may not be reflected in the database. To resolve this issue, you can update the database with sudo updatedb (which might take some time) or use the -e option that only lists files existing at the time the locate command is run (essentially equivalent to find):
locate -e *ls
Using the recursive -R option allows the standard ls command to produce similar results:
ls -Rlha
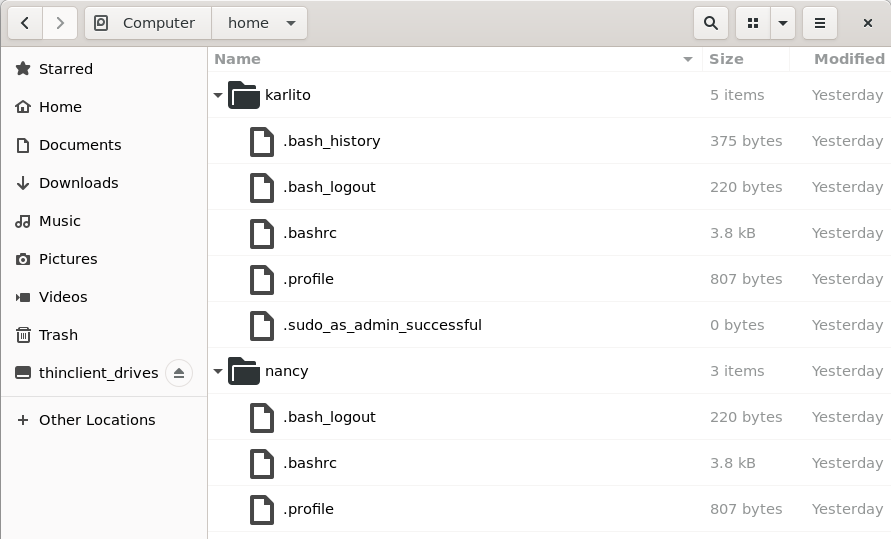
GNOME
You can produce analogous results using the GNOME desktop environment:
Searching by name
In the following examples, we'll search for all files with the .old extension.
find
Because we're searching for all files, we use the sudo command to avoid permission errors and start the search from the root directory (/):
sudo find / -iname *.old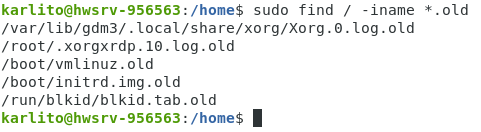
Note that the -iname option ignore case whereas -name does not.
locate
In the following, the -i option ignores case:
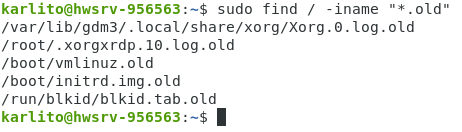
sudo locate -i *.old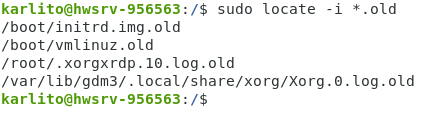
Interestingly, even with the -e option, the locate command does not find the /run/blkid/blkid/tab.old file (whereas find does).
GNOME
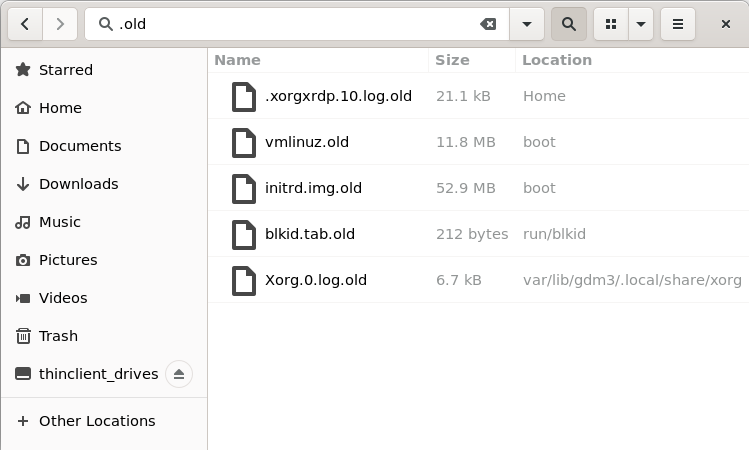
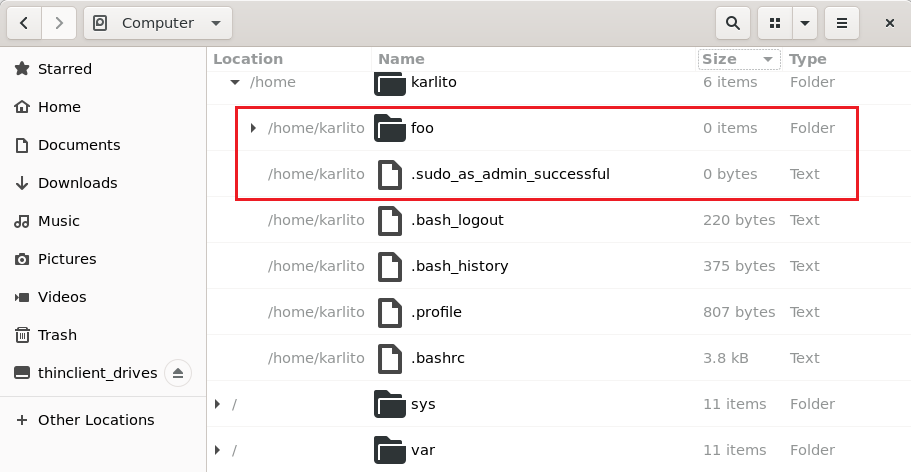
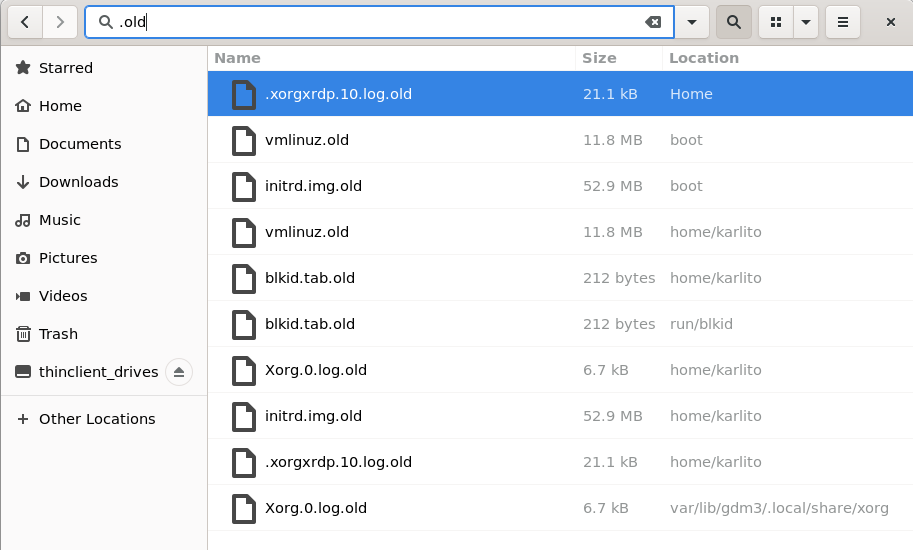
Without the wildcard character (*), the GNOME desktop Files application provides essentially the same information as the find command:
Searching by size
Let's say we would like to find all files larger than 50 MiB. For this task, we can add the du command to our list of likely suspects:
du
The du command was designed specifically for this task:
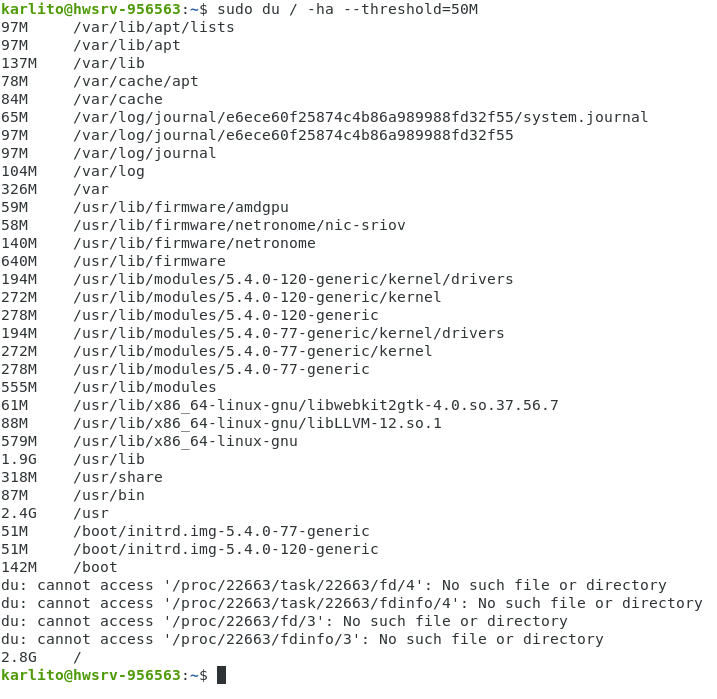
sudo du / -ha --threshold=50MThe -h option provides standard (human) file sizes and the -a option includes files as well as directories:
To suppress (the four) error messages, you can use the 2>&- argument. You can can also sort by file size:
sudo du / -ha --threshold=50M 2>&- | sort -h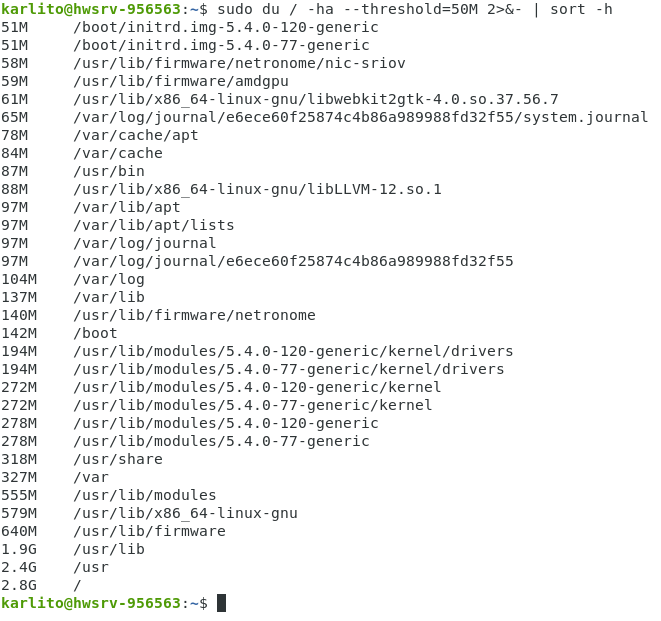
The last row shows that the disk contains 2.8 GiB of data in total.
find
The following finds all files (excluding directories) larger than 50 MiB:
sudo find / -size +50M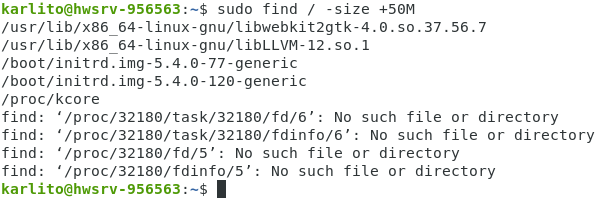
To view the size of each file in bytes, you can use the -ls option (and 2>&- to remove the error messages):
sudo find / -size +50M -ls 2>&-
The 7th column provides the size of each file, in bytes. To view just the file path, type, and size, you can use the -printf option, as shown:
sudo find / -size +50M -printf "%p %y %s bytes\n" 2>&- | column -t
The %p returns the filename, %y the file type, %s the size in bytes, and \n generates a newline character (for details, execute man find).
The column -t command creates columns based on whitespace characters. Note that 140737477885952 bytes is just under 128 PiB, which is clearly incorrect. A more accurate rendition follows:
sudo find / -size +50M -printf "%p %y %k KiB\n" 2>&- | column -t
In the above, %k provides the file size in KiB (as opposed to %s bytes).
locate
Because the locate command's database does not contain file size information, you can't list files larger than 50 MiB solely with locate.
GNOME
GNOME's desktop Files application provides typical GUI results:
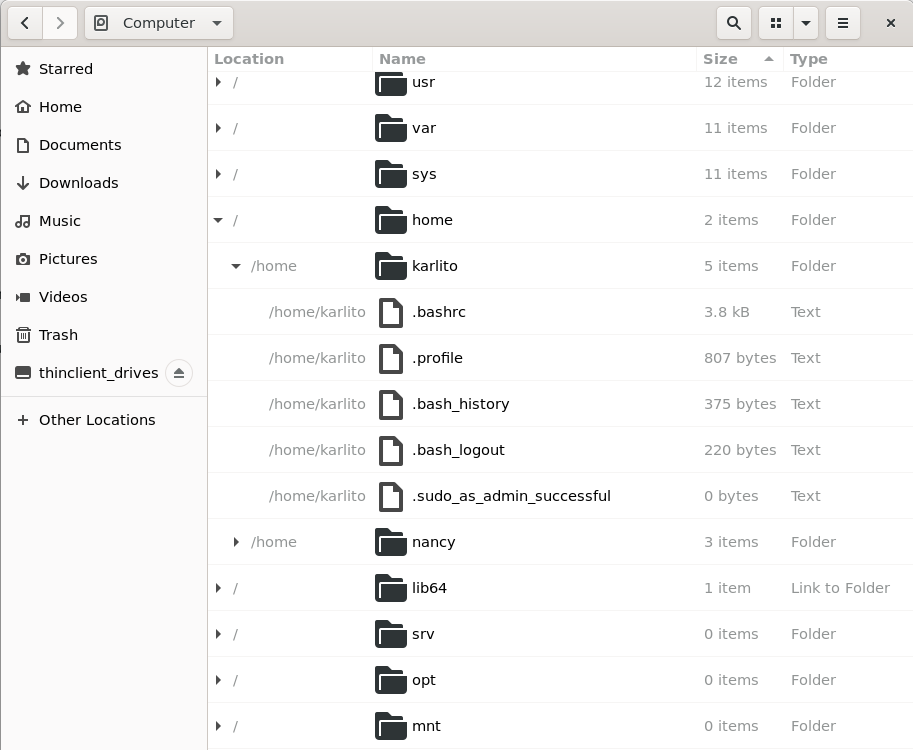
As can be seen above, sorting by the Size column isn't entirely helpful with respect to finding all files larger than 50 MiB. The du or find commands are more appropriate for such a task.
Finding empty files
A number of the commands mentioned above have options specifically for finding empty files. We'll examine these next.
find
For the find command, this task is straightforward:
sudo find /tmp -empty -type f,dThis command finds all empty files and directories (i.e., -type f,d) within the /tmp folder, as shown:
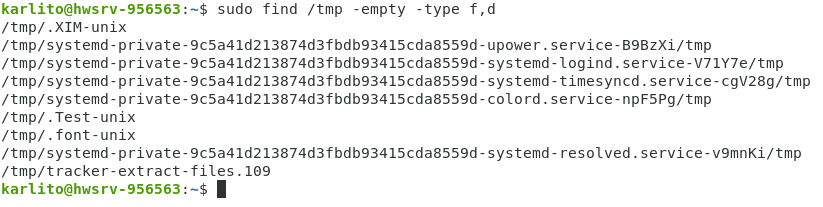
But which is which? As above, we can use -printf and column as follows:
sudo find /tmp -empty -type f,d -printf "%p %y %s bytes\n" | column -t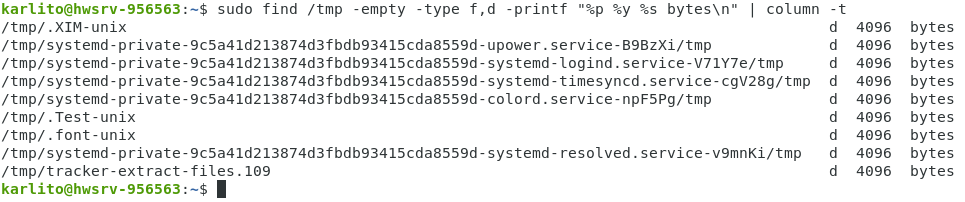
Note that each empty directory requires 4096 bytes (4 KiB) to exist in the Ubuntu file system. Here's an example of a single empty directory and a single empty file:

locate
Again, because the locate database does not contain file size information, there's no way to directly find empty files/directories using just the locate command.
GNOME
GNOME's desktop Files application provides relatively non-helpful results:
One would have to do a lot of clicking to identify all of the empty files using GNOME desktop environment.
Performing actions on file matches
Now that we know how to find files, we may wish to perform actions on them; such as deleting all *.old files.
find
The find command's -exec option executes the provided command once for each matched file. For example:
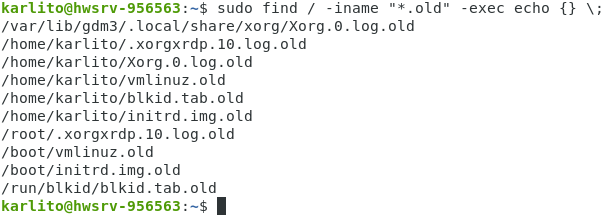
sudo find / -iname "*.old" -exec echo {} \;In a nutshell, this executes the echo command on each .old file found. Here, the {} syntax represents each matching file. Thus, if vmlinux.old is a matching file, then the command echo vmlinux.old is executed. The semicolon is used to indicate the end of the command string following the -exec option. Because the semicolon has special meaning, it must be escaped with the backslash characters (\), as follows:
To delete all *.old files from the /home/karlito directory (or ~ directory), you can run the following command:
sudo find . -iname "*.old" -exec rm -f {} \;We can see that all files in the ~ directory have been removed:
locate
The locate command does not have an -exec option. However, we can emulated this functionality using the xargs command:
sudo locate -i "*.old" | xargs -0 echo
The -0 option allows xargs to correctly handle atypical filename characters.
To remove all *.old files from the /home/karlito directory, you can run:
sudo locate -i "/home/karlito/*.old" | xargs rm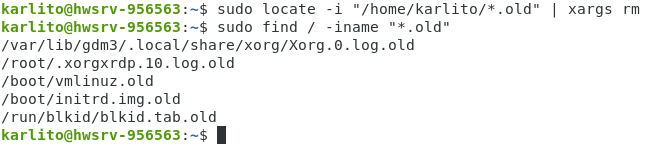
Similarly, to remove all .old files listed in the locate command's database (generally all *.old files on disk), you can run:
sudo locate -i "*.old" | xargs rmGNOME
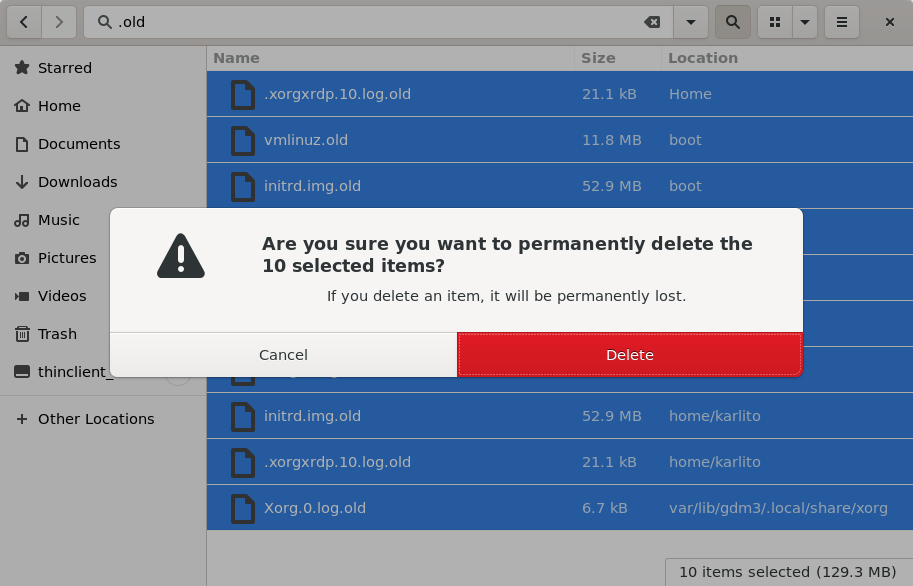
To perform the same action using the Files application, first search for all files with a .old extension:
Next, select all matching files by pressing Ctrl + A. Then, press the Delete key and select the Delete button:
We can confirm the deletion at command prompt as follows:

Because the xargs command is fast, flexible, and can be used with many other commands, it generally makes sense to use it for most scenarios. For example, the following copies all files containing "backup" into a directory called "backups" in user's home folder:
sudo find / -type f -iname "*backup*" -print0 | xargs -0 -I {} sh -c 'stat -c "%n %s bytes" {}; cp {} ~/backups'A detailed explanation of each command and option follows:
- sudo Allows the find command to search without encountering permission denied errors.
- find A command that searches for files (execute man find for details).
- / Starts the search from the root directory.
- -type f Searches for files (and not directories).
- -iname "*backup*" While ignoring case, instructs the find command to find all files containing "backup" somewhere in the filename. Note the use of the two (*) wildcard characters.
- -print0 Formats the output of the find command such that it can be consumed by other commands, including xarg. In particular, -print0 allows file names that contain newlines or other types of white space to be correctly interpreted by programs that can process such input. Note that the -print0 option corresponds to the -0 option of the xargs command.
- xargs Converts its standard input into arguments for other commands, such as the stat and cp command.
- -0 Prepares the xargs command to receive input that might contain white space, quote marks, or backslashes.
- -I The capital "i" option allows the input to xargs to be used in more than one place, such as via {} token.
- sh -c This invokes a separate command line interpreter (shell) and executes the commands passed to it. In this case, 'stat -c "%n %s bytes" {}; cp {} ~/backups'. This second shell allows xargs to run multiple commands using the {} token.
- stat -c "%n %s bytes" {} Displays the name %n and size %s of the file contained in the {} token (in bytes).
- ; The semicolon allows two or more commands to be executed on the same line.
- cp {} ~/backups Copies the given {} file to the ~/backups directory.
Putting all of this together results in output similar to the following:
 In the above, we can see all files that were theoretically copied to ~/backups. It's theoretical in that not all files were actually copied:
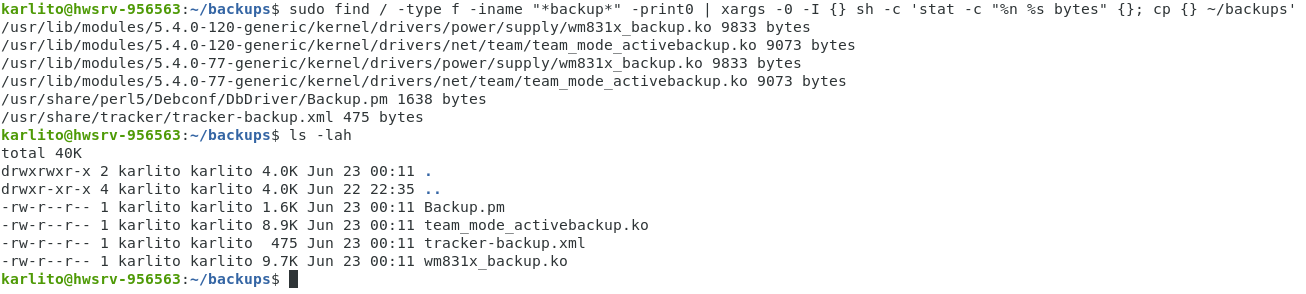 This is an important point - there were no issues with respect to displaying stat related information but there were issues for the cp command (that are not reported).
Refining searches with the grep command
Next, we will search the contents of matching files in order to find one or more keywords. To start, we'll examine all *.log files for occurrences of warning. To do so, we use the ubiquitous grep command:
sudo find / -iname '*.log' -type f -print0 | xargs -0 grep warningRunning the commands prior to the pipe ( | ) operator returns the expected list of *.log files. However, running the entire command line returns per file permission denied errors:
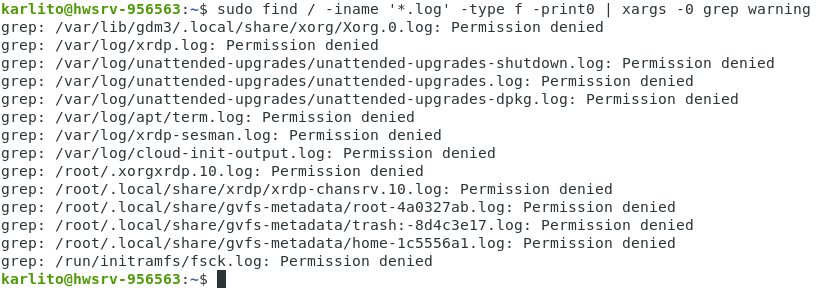
This is because the grep command also requires sudo elevation. Thus, the following command line produces the desired results (both -iname and -i ignore case):
sudo find / -iname '*.log' -type f -print0 | xargs -0 sudo -i grep warning
To find all *.log files containing warning, critical, and/or error, we can use the logical OR ( | ) operator, which must be escaped in order for it not to be confused with the standard pipe operator:
sudo find / -iname '*.log' -type f -print0 | xargs -0 sudo grep -l -i 'warning\|critical\|error'The lowercase "L" option -l displays the list of matching files and not the associated content:

Conclusion
This tutorial compared and contrasted multiple ways of finding files in Ubuntu 22.04 LTS. It also provided techniques for executing commands on found files. Unix-like operating systems, including Ubuntu, offer an extremely rich command line environment to help you manage your Ubuntu computer/server.
Written by Karlito Bonnevie / June 20, 2022