
Hostwinds Tutorials
Search results for:
Table of Contents
Shared and Business Hosting Quick Start Guide
Tags: Web Hosting
So you've purchased hosting, and you are wondering what the first steps are. This guide will assist you on how to begin your journey by exploring cPanel and how to upload files for your website. Before setting up the host, if you do not already have a domain name registered, you will need to purchase a domain.
How Do I Login To My cPanel Account?
You can access your cPanel account using the link provided in the welcome email sent to you after the initial purchase of your website hosting plan.
How Do I Get My Site Built?
There are a variety of ways and tools that can be used for building your site. If you are familiar with how to code your own site or use a Website Builder such as Adobe Dreamweaver or Adobe Muse, you can upload the files from there to your hosting plan. If you are not too familiar with making sites or do not use Dreamweaver or Muse, you can either use the Drag and Drop Editor Weebly or another Application installed through Softaculous such as WordPress to build your site. Additional instructions on how these can be used can be found below.
How Do I Upload Files?
Option 1: Use the File Manager Web Interface
Now that you're logged in to cPanel, click the link that says, File Manager.

Select Web Root under "settings" in the top right, click Save, or click on "public_html" in the File Manager directory.
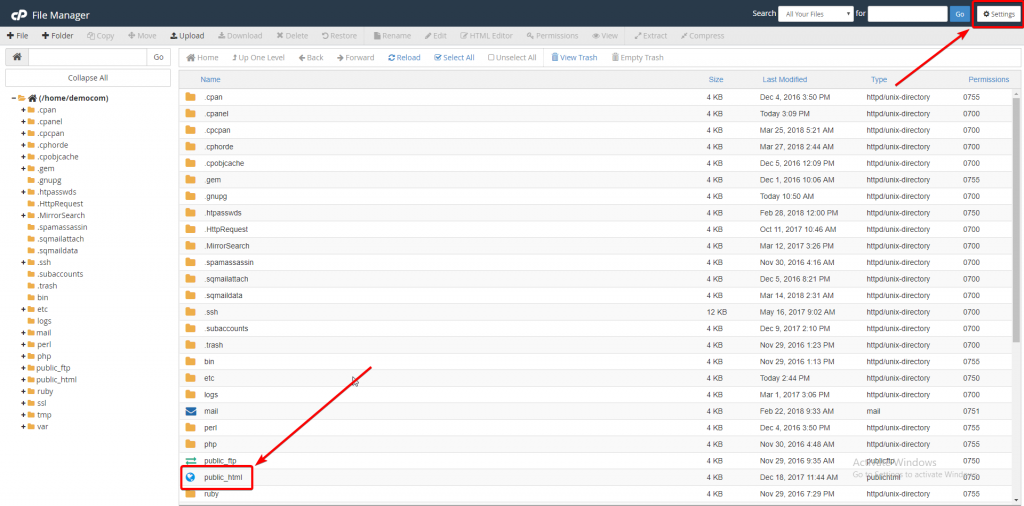
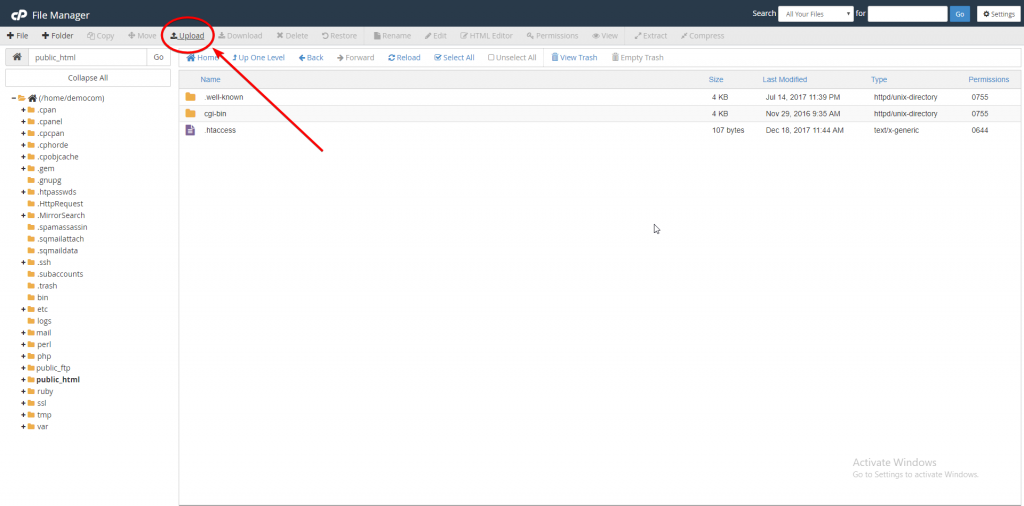
Click Upload to upload your website.
Good To Knows:
- The steps taken to upload files for your website can be performed in many ways. However, it is important to remember that any of these options upload your domain files into the "public_html" directory as this is your sites' root folder.
- Uploading files whose size is more than 50MB at a time will require FTP (Detailed below).
- Once the Domain Name Servers have propagated, your site will be fully loaded. For more information on how this works, you can see this article on setting up domain and hosting.
- File Manager is great for uploading files one at a time. However, to upload many files in the same session, you will want to use an FTP client.
Option 2: Using an FTP Client
We recommend using the FileZilla FTP client to upload your site.
Once FileZilla is installed, login to your account via FTP:
- Open FileZilla
- Enter your temporary FTP Hostname or the IP address of the hosting plan that is in your Welcome e-mail message
- Next, you'll enter your Username and Password from the Welcome e-mail message (same details as your cPanel login)
- Navigate to the public_html folder and upload your site
Once the Domain Name Servers have propagated, your site will be fully loaded.
Using Weebly To Build Your Site
Some may not prefer to use WordPress or build their site from scratch and want something with a Drag and Drop aspect. Luckily, with our Shared and Business hosting plans, there is the Weebly Site Builder that can be used. Accessible directly from the cPanel, you can drag and drop your site to your heart's content to easily make your site. When you are satisfied with what you have, click Publish, and your site will go live.
Installing Software via Softaculous
Within all of our Shared, Business, and Reseller hosting packages is the Softaculous App Installer. This potent tool is loaded with hundreds of popular software scripts set up for quick and easy installation. These include but are not limited to WordPress, Drupal, Joomla, etc.
Creating and Accessing Email Accounts
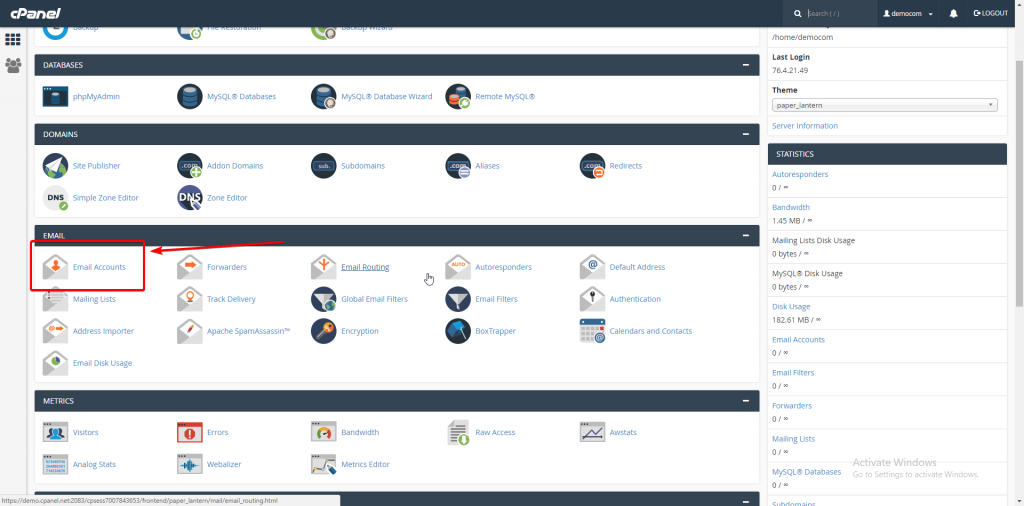
From cPanel, it's straightforward to both add and log in to new email accounts. To create a new email account, click the Email Accounts icon in your cPanel, and on the resulting page, fill in the appropriate details.
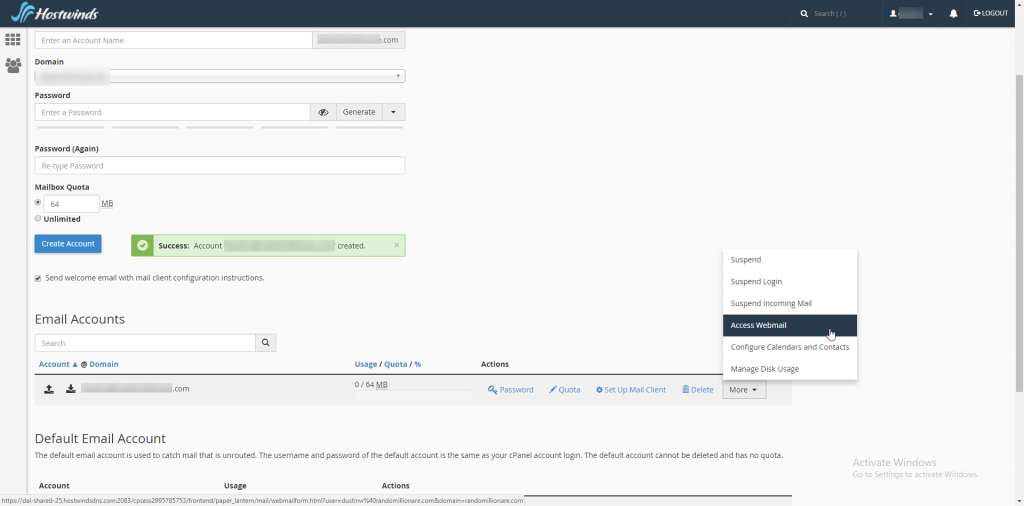
To log in to created email accounts, navigate to the same Email Accounts page, and you will see a listing of your created accounts. Click the "More" drop-down menu next to the account in question, then click "Access Webmail" to log in. This will prompt the selection of Horde, Round Cube, and Squirrel Mail. After selecting a Webmail template, your Webmail will launch.
If you should have any questions or would like assistance, please contact us through Live Chat or by submitting a ticket with our Technical Support team.
Related Web Hosting Tutorials:
Written by Hostwinds Team / June 5, 2021